A great starter hardware project using the Raspberry Pi is hooking up a simple tactile switch to the Raspberry GPIO and detecting button presses in Python.
This guide will guide you through setting up the circuit with the Raspberry Pi and reading the state of the button in Python. Integrating the button with Python allows you endless possibilities of actions to execute on a button press. You could send a tweet or turn on a LED.
What you’ll need for this guide
We will need the following tools to complete the project:
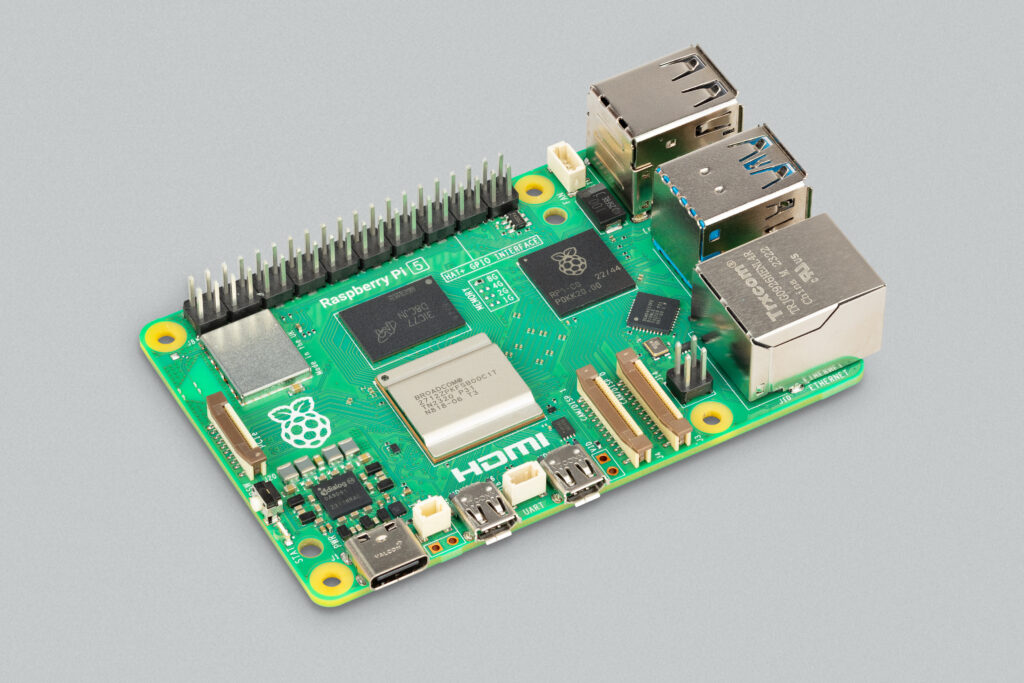
- Raspberry Pi or Raspberry Pi Zero setup with monitor and USB Mouse & Keyboard
- Checkout this guide if you need help
- Solderless breadboard
- Jumper wires
- Resistor pack
- Tactile switch / push button
- Multimeter (optional)
Setting up the circuit
Connecting the Raspberry Pi’s general purpose input output ports (GPIO) to a momentary tactile push button switch is a fairly simple circuit.
We connect one side of the switch to an input pin on the Raspberry Pi, in this case we use pin 10. The other side of the switch we connect to 3.3V on pin 1 using a resistor. The resistor is used as a current limiting resistor to protect our input pin by limiting the amount of current that can flow.
The circuit looks as follows:
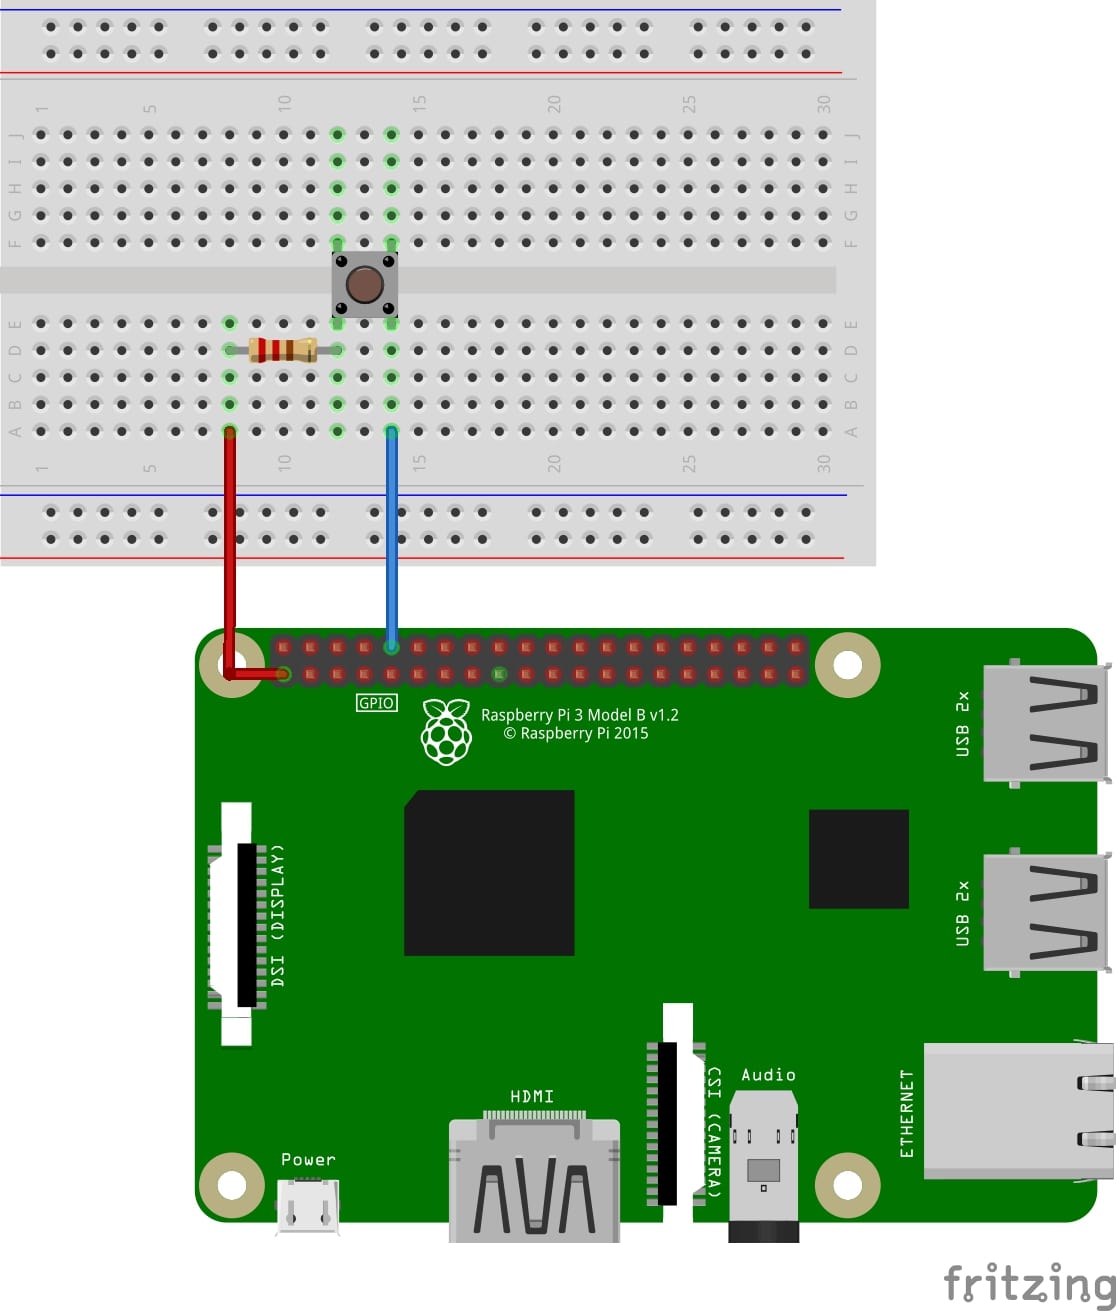
The idea is that the input pin will be low (0V) when the button is not pushed. When the button is pushed it will connect the pin to 3.3V and change the state to high (3.3V).
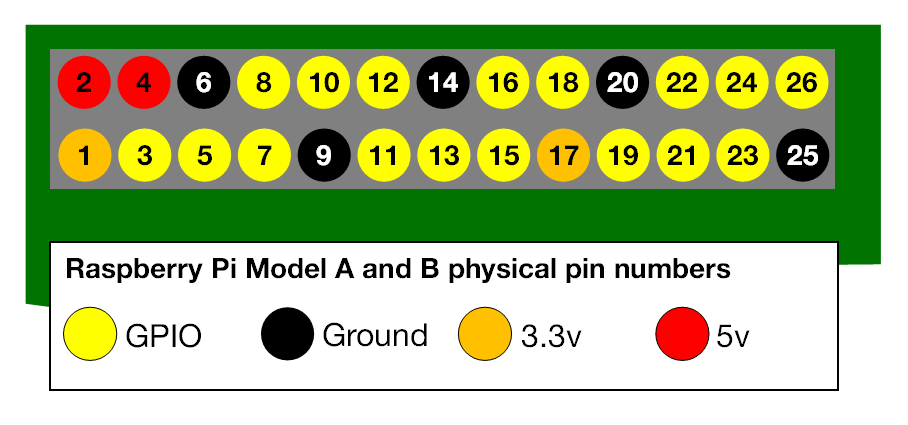
When you hook up the circuit you can use the following reference to diagram to find the correct pin numbers.
Writing the Python program to read the GPIO pin
With the circuit created we need to write the Python script that actually reads the state of the button and executes code based on the state.
Before we start writing the software we first need to install the Raspberry Pi GPIO Python module. This is a library that allows us to access the GPIO port directly from Python.
To install the Python library open a terminal and execute the following
$ sudo apt-get install python-rpi.gpio python3-rpi.gpio
With the library installed now open your favorite Python IDE (I recommend Thonny Python IDE more information about using it here).
Our initial script will initialize the GPIO port and then continuously read the status of the pin until we exit the program.
First we import the GPIO library and then setup the library to use board numbering. We then initialize pin 10 as an input pin, and instruct the Raspberry Pi to pull the pin low using the pull_up_down parameters.
The initialization code looks as follows:
import RPi.GPIO as GPIO # Import Raspberry Pi GPIO library

GPIO.setwarnings(False) # Ignore warning for now
GPIO.setmode(GPIO.BOARD) # Use physical pin numbering
GPIO.setup(10, GPIO.IN, pull_up_down=GPIO.PUD_DOWN) # Set pin 10 to be an input pin and set initial value to be pulled low (off)
The pull_up_down parameter in the GPIO.setup call tells the Raspberry Pi which state the pin should be in when there is nothing connected to the pin. This is important since we want our program to read a low state when the button is not pushed and a high state when the button is pushed.
With the port initialized we can write the code that continuously reads the port and outputs a message when the button is pressed. We use the GPIO.input function to read the state of the port.
while True: # Run forever
    if GPIO.input(10) == GPIO.HIGH:
        print("Button was pushed!")
We can now execute this program by saving it as push_button.py and running it either in Thonny or in the console as follows:
$ python3 push_button.py
You’ll notice that when you push the button the script outputs “Button was pushed!” many times. This is because we are continuously reading the state of the button. To get around this issue we can use a GPIO event. We will talk through how to do this in the next section.
If the program does not work, or continuously outputs “Button was pushed!” without the button being pressed down, try rotating the button 90 degrees.
Event based GPIO input in Python
We want to rewrite our program to output a single message whenever the button is pressed rather than continuously outputting a message. To do this we need to use GPIO events.
A GPIO event in the Raspberry Pi Python GPIO library works by calling a Python function whenever an event is triggered. Such a function is called a callback function.
An event can be an input pin being low or high, but it could also be when the pin changes from low to high – called rising – or when the pin changes from high to low – called falling.
In our case we want to detect when the button is being pressed, that is going from low to high also called the rising edge.
Before we setup the event we must however first write the callback function to be executed when the event is detected. The callback function is a regular Python function and as such can contain any Python code, it could send out a tweet or as we do in our case simply print “Button was pushed!”.
At the top of our program we import the GPIO library and define the function as follows:
import RPi.GPIO as GPIO # Import Raspberry Pi GPIO library

def button_callback(channel):
    print("Button was pushed!")
Next the program will initialize the input pin as follows:
GPIO.setwarnings(False) # Ignore warning for now
GPIO.setmode(GPIO.BOARD) # Use physical pin numbering
GPIO.setup(10, GPIO.IN, pull_up_down=GPIO.PUD_DOWN) # Set pin 10 to be an input pin and set initial value to be pulled low (off)
With the pin defined as a input pin we can attach the event to the pin.
GPIO.add_event_detect(10,GPIO.RISING,callback=button_callback) # Setup event on pin 10 rising edge
Notice how we provide the function name as the callback parameter such that the library knows which function to call when the event is triggered.
Finally we instruct python to wait for keyboard input and when someone presses enter cleanup the GPIO input library resources and finish the program.
message = input("Press enter to quit\n\n") # Run until someone presses enter
GPIO.cleanup() # Clean up
The combined code looks as follows:
import RPi.GPIO as GPIO # Import Raspberry Pi GPIO library

def button_callback(channel):
    print("Button was pushed!")

GPIO.setwarnings(False) # Ignore warning for now
GPIO.setmode(GPIO.BOARD) # Use physical pin numbering
GPIO.setup(10, GPIO.IN, pull_up_down=GPIO.PUD_DOWN) # Set pin 10 to be an input pin and set initial value to be pulled low (off)

GPIO.add_event_detect(10,GPIO.RISING,callback=button_callback) # Setup event on pin 10 rising edge

message = input("Press enter to quit\n\n") # Run until someone presses enter

GPIO.cleanup() # Clean up
We can now save the file and execute the program either in Thonny or on the command line with:
$ python3 push_button.py
You now see that the program only outputs one “Button was pushed!” everytime the button is pushed.
This guide showed you how to read the state of a push button switch using the Raspberry Pi and the Python programming language. For more tips and guides on using electronics with the Raspberry Pi checkout the electronics section and join our newsletter!

1 Comment
Raspberry Pi Project Ideas | Raspberry Pi HQ · February 10, 2018 at 1:19 pm
[…] If you’re ready to get started with electronics and the Raspberry Pi checkout some of our tutorials: Making a LED blink using the Raspberry Pi and Python and Using a push button with Raspberry Pi GPIO. […]
Comments are closed.