Do you want a separate WiFi network for your guests? or would you like to have network running an alternative DNS configuration in your house? You no longer have to buy a new WiFi router to do this – you can turn your Raspberry Pi into a WiFi router.
This post will guide you through the process of setting up your Raspberry Pi as a WiFi network.
Prerequisites & Equipment
You are going to need the following:
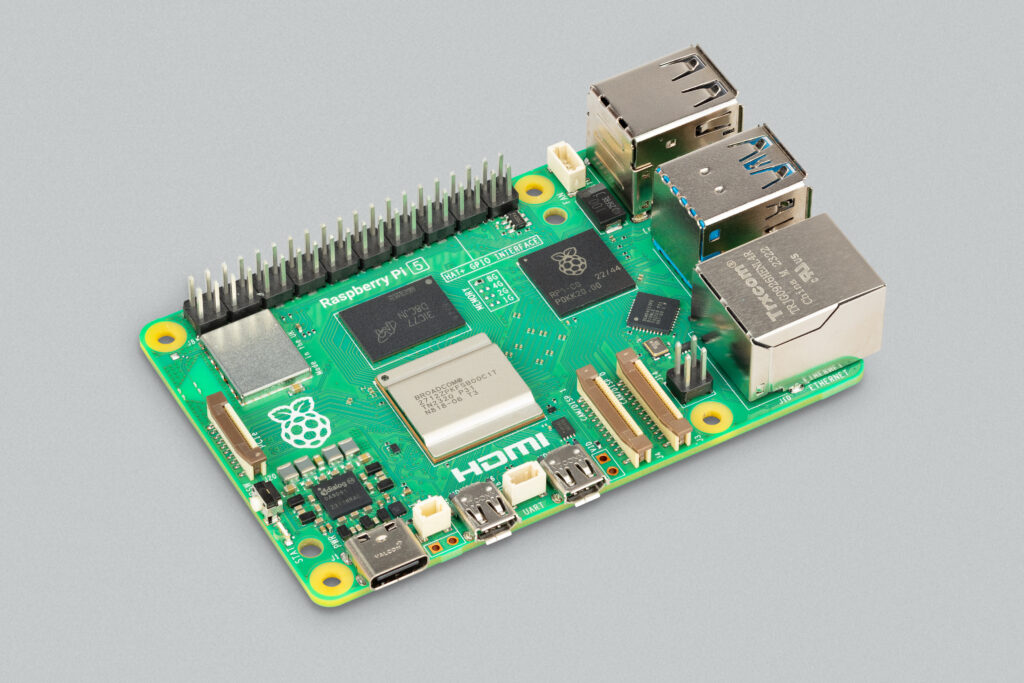
- A Raspberry Pi (Buy here)
- A USB WiFi Adapter (I use the Edimax USB adapter – its small and cheap!)
- A SD Card flashed with the Raspbian OS (Here is a guide if you need)
- Access to the Raspberry either via keyboard and a monitor or remotely

Raspberry Pi with Edimax Wifi Adapter
Before we proceed I want to point out the importance of buying the right USB WiFi Adapter. As you may have experienced with other types of hardware devices not all devices are plug-n-play. Sometimes you will need to download a driver to make them work. While drivers are normally readily available for Windows computers – it is a different world for Linux and Raspberry Pi’s. This is why it is very important to buy a WiFi Adapter that mentions “Linux” in the product description or package. I use the Edimax – Wireless USB adapter because I have found it to be cheap and very easy to work with. I very recommend you do the same – it could save you a lot of headaches.
Getting WiFi adapter running on the Raspberry Pi
Plug the USB WiFi adapter into one of the free USB ports on the Raspberry Pi. Power up the Raspberry Pi. At this point you need to either connect to the Raspberry Pi via an Ethernet cable or use a keyboard and a monitor to access the Raspberry Pi.
If you need help connecting to the Raspberry Pi look at this post remotely using a wired network connection.
After booting and logging-in you want to make sure that the Raspberry Pi found your new wireless adapter. To look at which peripherals the operating system found when booting run the following command:
dmesg | more
You can use the spacebar to scroll down a page at a time – towards the end you will see something similar to the following lines:
[ 3.282651] usb 1-1.2: new high-speed USB device number 4 using dwc_otg
[ 3.394810] usb 1-1.2: New USB device found, idVendor=7392, idProduct=7811
[ 3.407489] usb 1-1.2: New USB device strings: Mfr=1, Product=2, SerialNumber=3
[ 3.420530] usb 1-1.2: Product: 802.11n WLAN Adapter
This means that the operating system recognized the USB WiFi Adapter using one of the built-in drivers (you can return to the terminal by pressing “q”). All that is left is to configure your WiFi connection.
Install the router software
In order for the Raspberry Pi to act as a WiFi router and access point you need to install some extra software on the Raspberry. You are going to need the following pieces of software:
- hostapd
HostAPD is a user space daemon for access point and authentication servers. That means it can will turn your Raspberry Pi into a access point that other computers can connect to. It will also handle security such that you can setup a WiFi password. - isc-dhcp-server
isc-dhcp-server is the Internet Systems Consortium’s implementation of a DHCP server. A DHCP server is responsible for assigning addresses to computers and devices connection to the WiFi access point.
To install the DHCP software run the following command:
sudo apt-get install isc-dhcp-server
Next up is the HostAPD software. Because our USB stick needs an access point driver not supported by the native HostAPD application we must install a custom version compiled with the driver we need. This can be done by running the following commands one at a time.
wget https://github.com/jenssegers/RTL8188-hostapd/archive/v1.1.tar.gz
tar -zxvf v1.1.tar.gz
cd RTL8188-hostapd-1.1/hostapd sudo make sudo make install
This will take a little time – while waiting for the program to compile send a friendly thought to Jens Segers over at http://jenssegers.be for making this software available.
Once downloaded we are ready to configure the software.
Configure the ISC-DHCP-Server
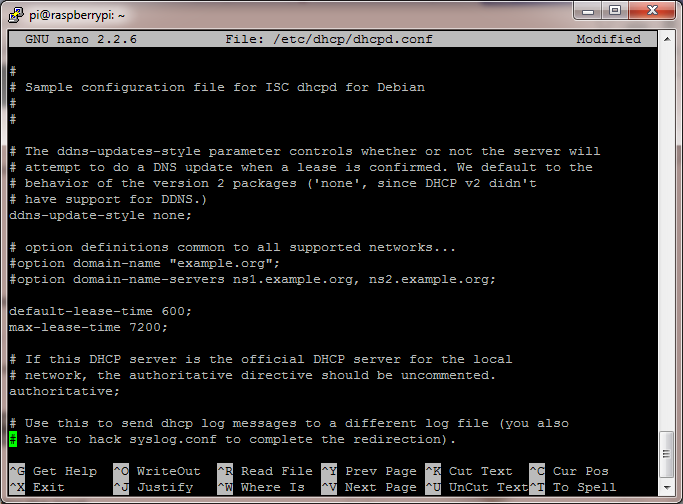
To configure the DHCP server open the file /etc/dhcp/dhcpd.conf in your favorite text editor. You can open it in nano using this command:
sudo nano /etc/dhcp/dhcpd.conf
Find the following section and comment it out by placing a hashtag at the beginning of the line.
option domain-name "example.org";
option domain-name-servers ns1.example.org, ns2.example.org;
Next find the section below and un-comment the word authoritative (remove hastag):
# If this DHCP server is the official DHCP server for the local
# network, the authoritative directive should be uncommented.
#authoritative;
The file now looks like this:
Next we need to define the network and network addresses that the DHCP server will be serving. This is done by adding the following block of configuration to the end of file:
subnet 192.168.10.0 netmask 255.255.255.0 {
 range 192.168.10.10 192.168.10.20;
 option broadcast-address 192.168.10.255;
 option routers 192.168.10.1;
 default-lease-time 600;
 max-lease-time 7200;
 option domain-name "local-network";
 option domain-name-servers 8.8.8.8, 8.8.4.4;
}
This will enable the DHCP server to hand out the ip addresses from 192.168.10.10 to 192.168.10.20 in its own local network. People who are skilled in network configuration can change these values if they wish to use some other network addresses and/or other DNS servers. This configuration will use the Google DNS servers at 8.8.8.8 and 8.8.4.4.
To save the file press Ctrl+O this will write the file to the disk – afterwards you can exit nano by pressing Ctrl+X. If nano asks if you want to Save modified buffer? press “Y” followed by hitting enter to confirm the filename.
Next file to edit is /etc/default/isc-dhcp-server, you can open it in nano using this command:
sudo nano /etc/default/isc-dhcp-server
Scroll down to the line saying interfaces and update the line to say:
INTERFACES="wlan0"
This will make the DHCP server hand out network addresses on the wireless interface. Save the file and exit nano.
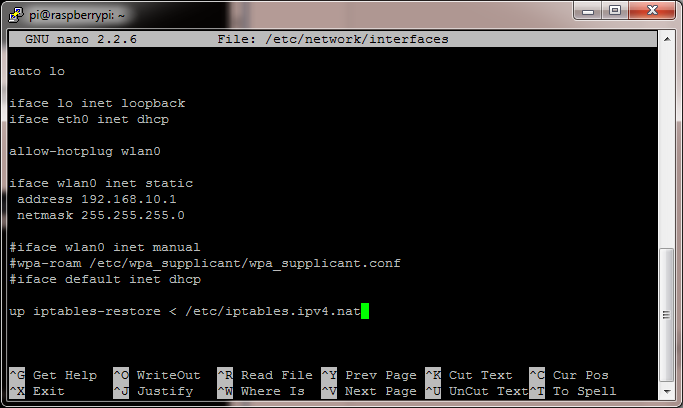
The last step in configuring the DHCP server is to configure a static ip address for the wireless network adapter. This is done in the file /etc/network/interfaces – before opening it make sure the WLAN interface is down. Do this with the following commands:
sudo ifdown wlan0
sudo nano /etc/network/interfaces
Change the file to look like this:

This will make the wireless adapter take the address 192.168.10.1 in our new local network. Remember to comment out the last 3 lines of the file.
This concludes the setup of the DHCP server – however we still cannot connect to our new network because we have not setup the access point yet. This is done by configuring the hostapd application.
Configuring HostAPD
To configure HostAPD, open the file called /etc/hostapd/hostapd.conf in your favorite text editor. You can open it in nano using this command:
sudo nano /etc/hostapd/hostapd.conf
The standard configuration will create a new wireless network called wifi with the password YourPassPhrase. You can change the parameter “ssid=wifi” to the SSID wifi name you want and the parameter “wpa_passphrase=YourPassPhrase” to your own password.
This concludes the configuration of our access point software HostAPD. Next up is enabling NAT.
Enable NAT
The last step before we can start the access point is setting up Network Address Translation (NAT). This will make sure that our network traffic will be able to reach the internet using the Raspberry Pi’s Ethernet cable connection to your internet router.
Open /etc/sysctl.conf with:
sudo nano /etc/sysctl.conf
Scroll down to the last line of the file and add the line:
net.ipv4.ip_forward=1
Next start the translation right away by running:
sudo sh -c "echo 1 > /proc/sys/net/ipv4/ip_forward"
Start the wireless network by running:
sudo ifup wlan0
Next step is setting up the actual translation between the ethernet port called eth0 and the wireless card called wlan0.
sudo iptables -t nat -A POSTROUTING -o eth0 -j MASQUERADE
sudo iptables -A FORWARD -i eth0 -o wlan0 -m state --state RELATED,ESTABLISHED -j ACCEPT
sudo iptables -A FORWARD -i wlan0 -o eth0 -j ACCEPT
With the NAT configured it is now time to run your access point for the first time.
Starting your wireless router
You are now ready to start the DHCP server and the HostAPD access point application.You can do so by running:
sudo service isc-dhcp-server start
sudo service hostapd start
At this point you should be able to find your wireless network on your laptop and connect to it and the internet!
Finishing up …
While it is pretty cool you now have your Raspberry Pi running as a wireless access point it is not so cool you have to login every time it reboots to start the HostAPD and DHCP software…
To avoid this run the following commands:
sudo update-rc.d hostapd enable
sudo update-rc.d isc-dhcp-server enable
To avoid having to configure NAT every time the Raspberry Pi reboots you can do the following.
Run this command to backup the NAT configuration.
sudo sh -c "iptables-save > /etc/iptables.ipv4.nat"
Add the following to the end of the file /etc/network/interfaces to restore the configuration when the network interface comes up:
up iptables-restore < /etc/iptables.ipv4.nat
The file should now look like:
At this point try to reboot the raspberry pi just to make sure everything works as intended – you can reboot with the command:
sudo reboot
Hopefully you will see your new access point come online again. After it comes up again you should be able to connect to it and access the internet!


10 Comments
Stanley · March 19, 2014 at 10:52 am
Hi very cool thing you did there! But I would like to know whether does this serve as an alternative to routers?
I’m looking for a powerful and yet low-powered wifi router for my house but I don’t seem to find any that satisfy my needs… I was thinking that the raspberry pi power would do the trick. Does the pi perform much better than the commercial routers?
admin · April 20, 2014 at 10:33 am
In terms of whole house coverage this is not the way to go. Remember the Pi only have a small embedded antenna in its WiFi adapter that will not give you very good full house coverage.
Emil · April 3, 2014 at 5:34 am
Can you port forward it? And if so, how?
Mike · April 6, 2014 at 8:01 am
Hello
I followed all the above very easy instructions, by far the simplest I’ve found, much appreciated. However, unfortunately it was not successful, I noticed there were one or two errors flagged as I went through the process but there was nothing I could do about them at the time. Please can you suggest anywhere I can get some troubleshooting tips from?
Many thanks
Mike
Cezary · April 14, 2014 at 5:45 pm
hello, ist is possible to run that under kernel 3.10 with raspbian?
Glen · April 20, 2014 at 2:00 am
Hi,
Is it possible to setup the router to block access to the local network? I would like to use the PI as a guest WiFi Access Point so I therefore I want to block access to my local network.
karkar · May 3, 2014 at 6:09 pm
after hitting
” sudo service isc-dhcp-server start
sudo service hostapd start”
i got this error..
————————————-
Configuration file: /etc/hostapd/hostapd.conf
drv->ifindex=3
l2_sock_recv==l2_sock_xmit=0x0x49648
ioctl[SIOCSIWMODE]: Invalid argument
Could not set interface to mode(3)!
Could not set interface to master mode!
rtl871xdrv driver initialization failed.
————————————————————————–
but..
my cellphone and laptop can STILL detect the SSID of my Raspberry pi.. but not able to connect to internet..
when i googled then someone had the same issue..
https://groups.google.com/forum/#!topic/beagleboard/_bx0UlaFWjg
is it required to upgrade my wifi dongle??or any issues??
please solve my issue
22decembre · May 7, 2014 at 1:55 am
I have heard that, due to his low power / performance profile, the Pi is not a good idea as a router. Yet, I really would like to do so.
Question : is the actual result (Pi as a router) good ? Is it fast / efficient ? Does it support the load well ? Fast networking ?
Scooby · June 23, 2014 at 7:35 am
When I run
sudo update-rc.d hostapd enable
I get…
update-rc.d: error: no runlevel symlinks to modify, aborting!
And when I run
sudo update-rc.d isc-dhcp-server enable
I get…
insserv: warning: script ‘mathkernel’ missing LSB tags and overrides.
I am using Raspbian Wheezy 2014-01-07
Roy · July 4, 2014 at 1:57 am
First of all, thanks, great tutorial. I also added Samba, so now it’s even a NAS.
I can stream over the wifi network, as long I also connect a network cable to it.
I also wanna use it if no network cable is connected, but I can’t connect to the wifi network then.
How can I change that so that it also can be used as a mobile NAS?
Comments are closed.